
Table of Contents
| TL;DR If you need any help or a discount on Untangle NGFW, email me on support@osh.co.za and we will help you out. |
We have tested and deployed many Firewall and UTM at clients over the years, such as pfSense, IPCop, FortiGate, and the original granddaddy of them all ISA server (Microsoft Forefront Threat Management Gateway). We have now settled on using Untangle for all of our clients because of the simplicity, cost, resource usage, effectiveness and flexibility of Untangle Next Gen Firewall (NGFW).
For the home lab, it costs only $50 a year and for larger companies and corporates, it works on a sliding scale that allows you to pay for what you want to be protected. You can also choose what modules you want to have included like SSL inspector, a directory connector (for connection to Active Directory), a WAN Balancer and WAN Failover etc. However, if you want to have the full functionality of the software, you can buy the complete version.
If you are a non-profit company, private or government school there are also special prices and deals for you. In terms of flexibility, you can deploy Untangle in a number of different ways, from 32bit and 64bit as a Virtual Appliance on Hyper-V using an ISO and VMWare using an OVA, deploy it on AWS and Azure or even on a bare-metal server.
Installing @untangle_inc on a Microsoft Hyper-V is easy and makes our deployment quick. Share on XInstead of paying for VMWare licenses most Windows servers can handle Hyper-V without a problem. I have set up Untangle on everything from Windows 10 (for a very small client), Windows Server 2008, 2012, 2016 and the latest version of Server 2019. If at some later stage you would like to move the server onto other hardware, having a virtual server makes a great deal of sense.
The set up is quite simple, but there are a couple of configuration issues that you must be aware of when you set up Untangle using the virtual switch for the WAN. If you follow this tutorial it should make the process quite simple.
Setting up Untangle, Full Step by Step Video.
So we now need to setup Untangle on the Hyper-V. Let's start with the virtual switches. As you know Untangle is a filter for traffic. This means that there need to be 2 network cards to allow you to go through Untangle NGFW for your web traffic. I normally refer to the 2 network cards as "Untangle LAN" and "Untangle WAN". This way you can set up your server easily and know exactly what is needed.
So let's click on the right hand side on the Virtual Switch Manager and then we will see this.

We then need to be able to add a new Virtual Switch. So click on the "New Virtual Network Switch" and you will see this.
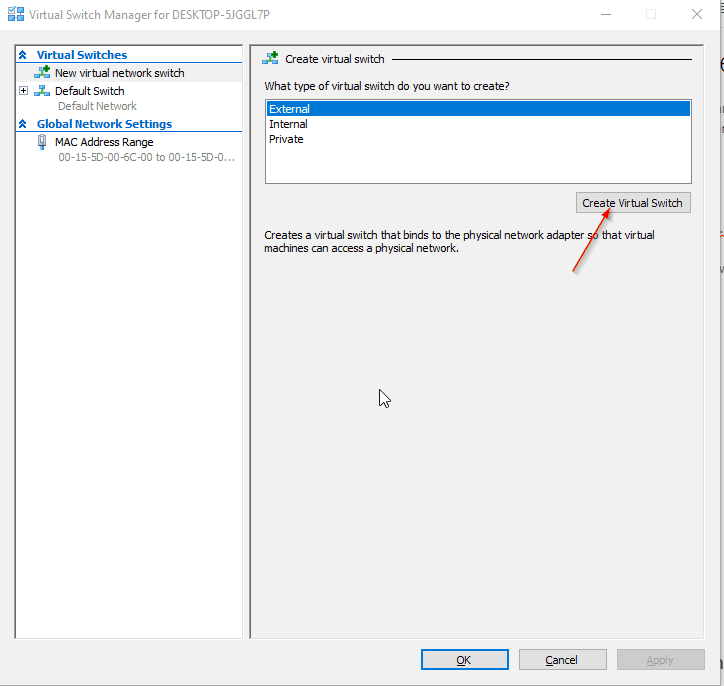
Name the Virtual Switch "Untangle WAN" and remove the “Allow management operating system to share this network adapter” tick box, this will prevent your host from trying to use it. This is the port that would plug directly into the internet router.
Now to create the second Virtual Network Switch. Please name this one "Untangle LAN". This is going to plug into the rest of the network. Make sure that you pick another network card that wasn't selected under Untangle WAN and make sure that the tick box by “Allow management operating system to share this network adapter” is still ticked. This will allow your host to share LAN access with this VM.
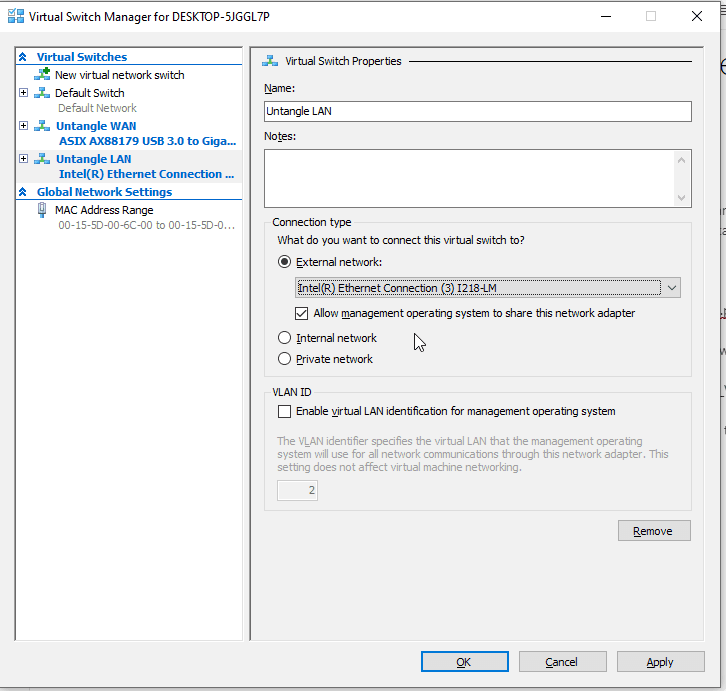
Now click "Ok" and wait for the network settings to be applied.
So now that we have done the set up for Untangle, let's get to installing Untangle NGFW on the Hyper-V.
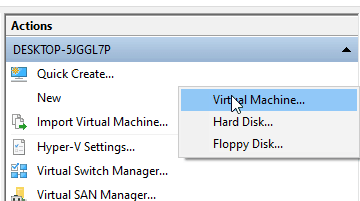
On the right-hand side click on the "New" link and then "Virtual Machine" flyout.
Click next past the first screen.
Then on the second screen, rename the new Virtual Machine "Untangle".
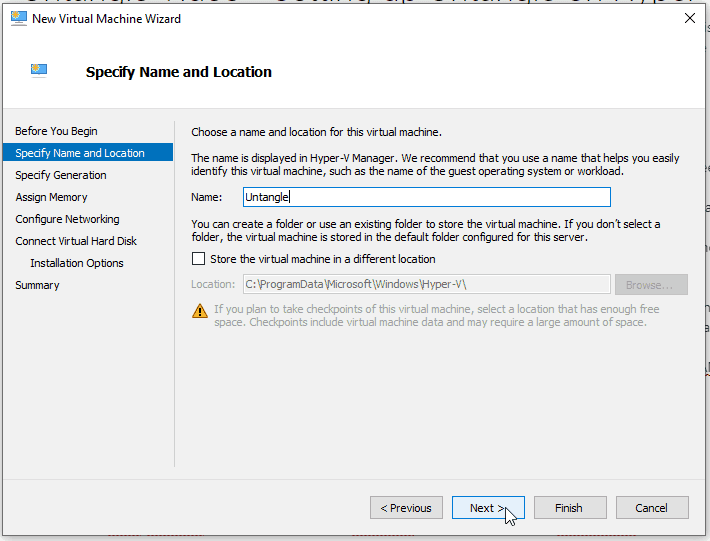
If you would like to store the machine in a different location or drive, select that at the bottom. For this example, we are going to leave it as is. Click next.
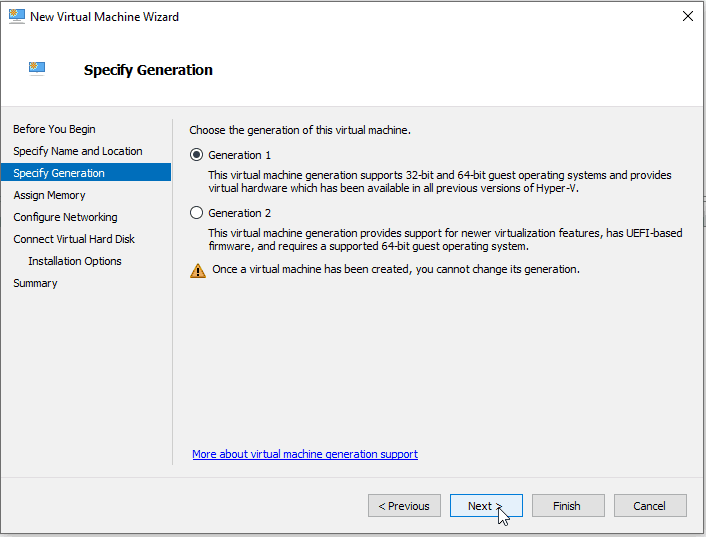
Select Generation 1 for the Virtual Machine and click next.
Choose how much ram you would like to assign to this VM. The more ram the more users you have the more ram you will need. https://wiki.untangle.com/index.php/Hardware_Requirements
| Resource | Processor | Memory | Hard Drive | NICs | Notes |
|---|---|---|---|---|---|
| 1-50 devices | Atom/P4 equivalent or greater | 2 GB | 80 GB | 2 or more | |
| 51-150 devices | Dual Core | 2 or more GB | 160 GB | 2 or more | |
| 151-500 devices | 2 or more Cores | 2 or more GB | 500+ GB | 2 or more | |
| 501-1500 devices | 4 Cores | 4 or more GB | 500+ GB | 2 or more | 64-bit |
| 1501-5000 devices | 4 or more Cores | 4 or more GB | 500+ GB | 2 or more | 64-bit |
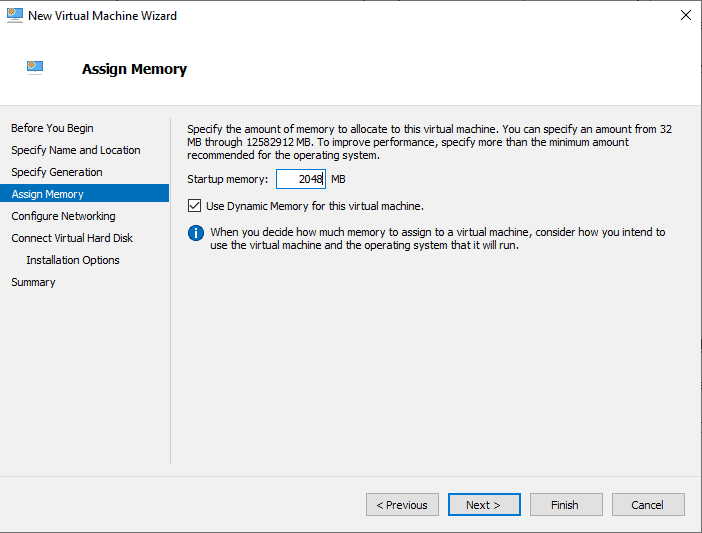
I am going to allocate 2gb of ram. Depending on the spec of your computer, you might want to remove the tick next to "Use Dynamic Memory". Then click next.
We now need to set up the network cards. We will need to add a second one before starting up Untangle as it needs to have 2 NICs to function properly.

You can pick either the Untangle WAN or the Untangle LAN connection here. Then click next.
Make sure that the new Virtual HDD connection is correct.
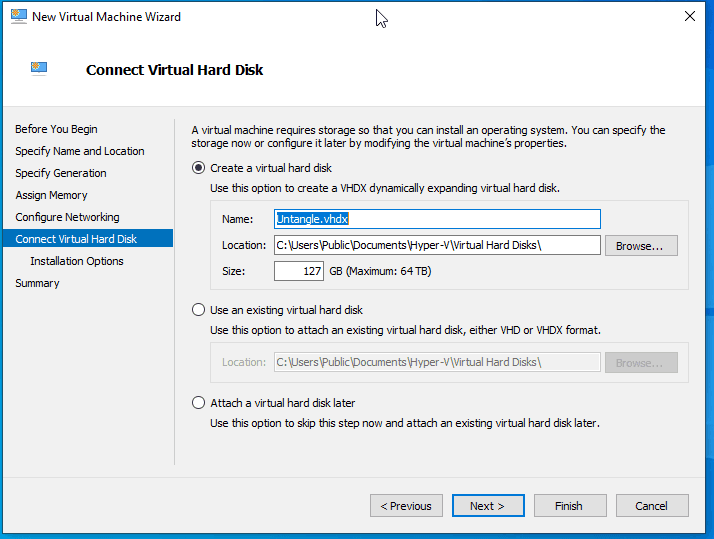
Check the specs to make sure that have allocated enough HDD space for your install. Also the longer you would like to keep logs for the more space you will need. And click next.
Let's download the ISO for untangle from here https://wiki.untangle.com/index.php/Downloads make sure that you download the latest version that is available for you when you are installing. Our version is 14.2.0.

We now need to insert this ISO into the install. Browse to find your ISO and click open.

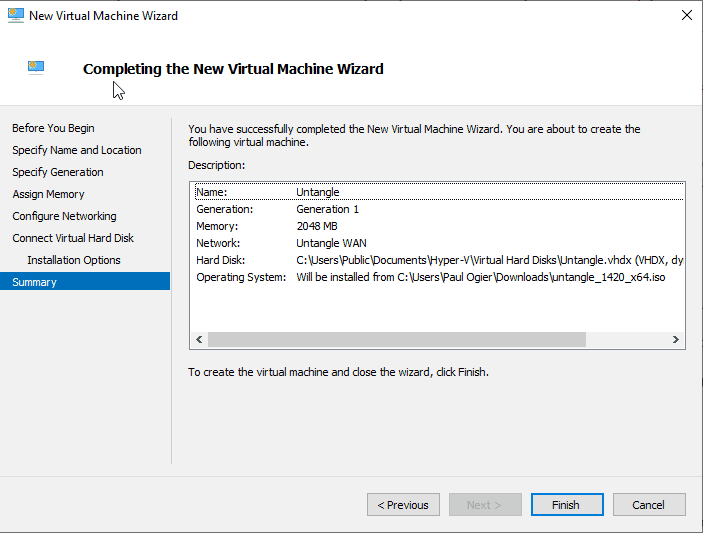
Click next. Review the settings and if you need to change anything do it now by clicking "Previous". If you are happy, then let's click "finish".
Wait for the new VM to be created.
NB: Before starting up Untangle, let's go into the settings. Right click on the newly created virtual machine and click on settings.
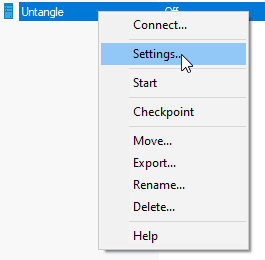
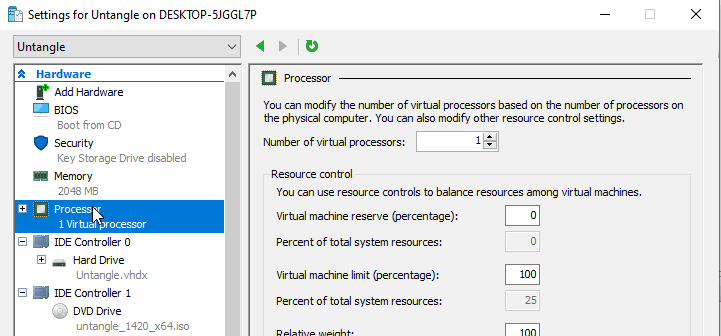
In the settings, there are a couple of things that need to be played with. Firstly if you are setting this up for more than a test and will be using this in a production environment, make sure that you choose the correct amount of processors.
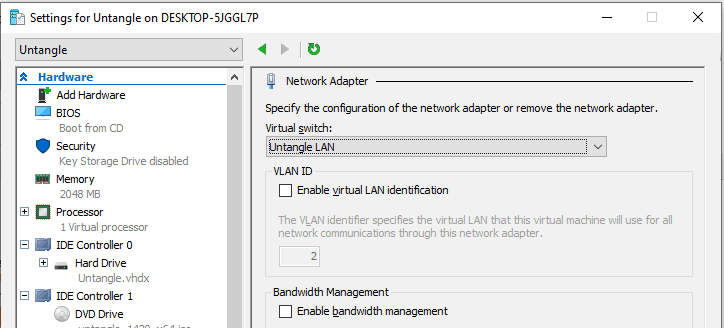
Let's now add the second NIC to the Untangle VM.
Click on "Add Hardware" and then network adapter, and click add.

Now pick the other virtual switch that you didn't select during set up.
Now click ok and we are ready to start the install. Right-click on the VM and click connect. Click on start.

There is very little difference between the graphical and normal install, the graphical is just prettier. Hit enter.
Pick your language.

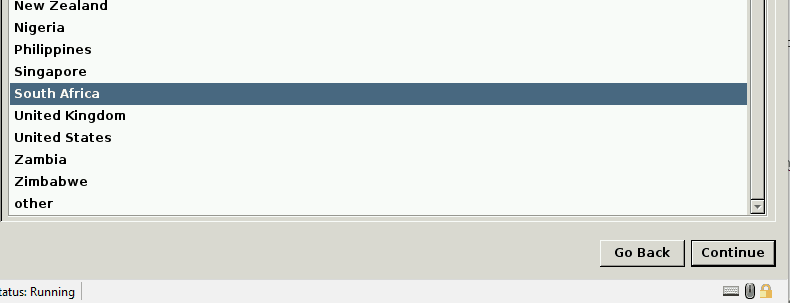
Pick your country
Pick your keyboard

It is now going to make these partitions on the virtual disk you created.
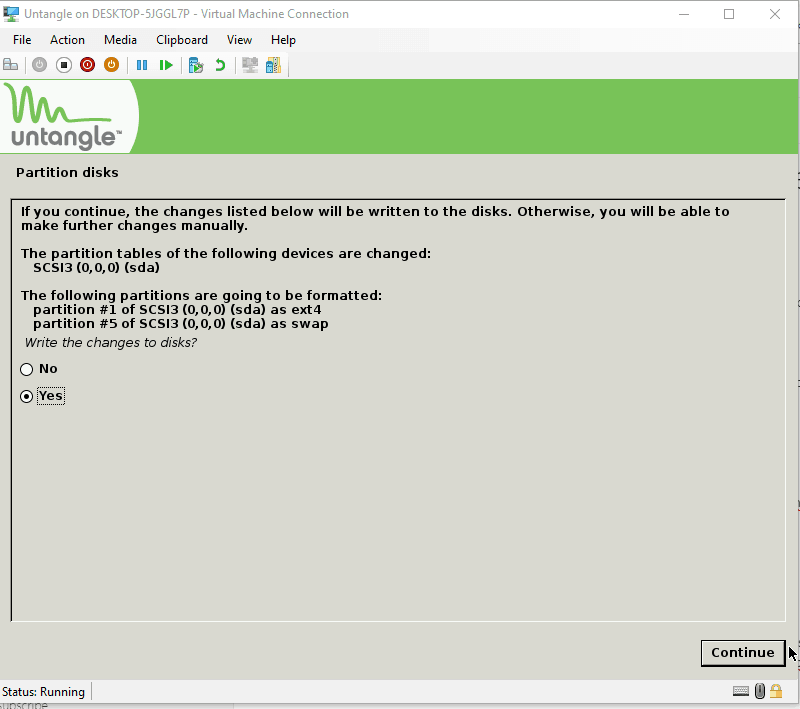
Now, wait while it installs.

This is the final screen of the install.

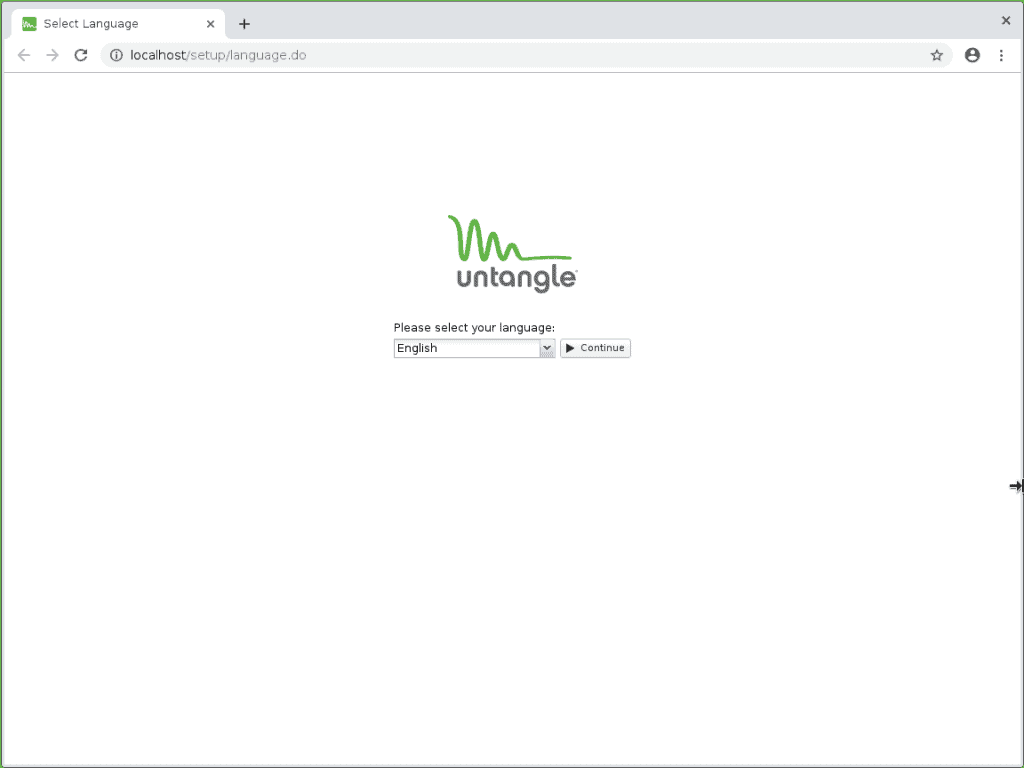
Reboot the system and you will see a wizard to get you started. Select your language and click continue.
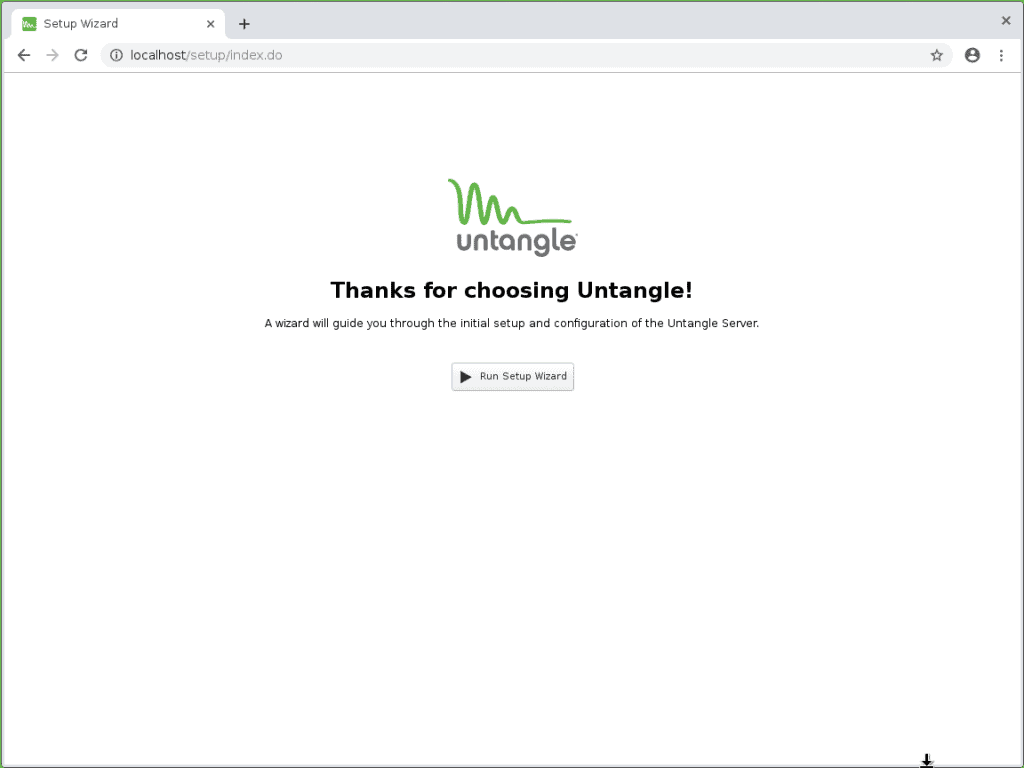
Click on the Run Setup Wizard button
On this page, fill in your passwords for Untangle and an admin email. Then on the right, choose either a predefined install type if it relates to your setup or select other if you want to set everything up manually. Finally, pick your timezone.
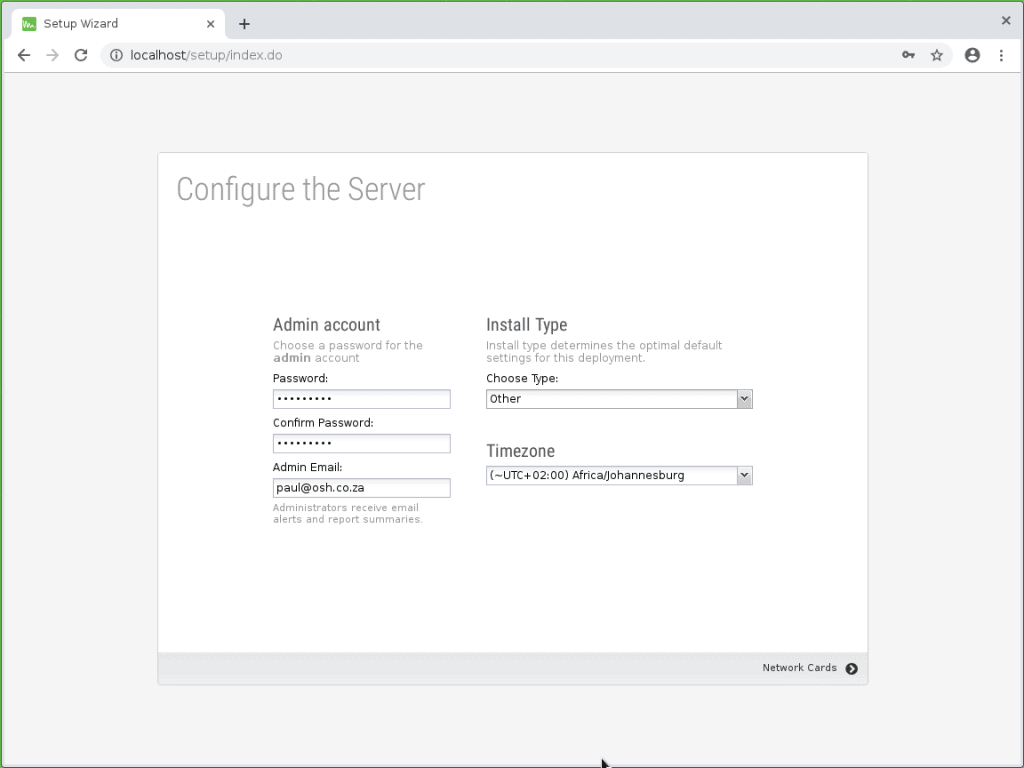
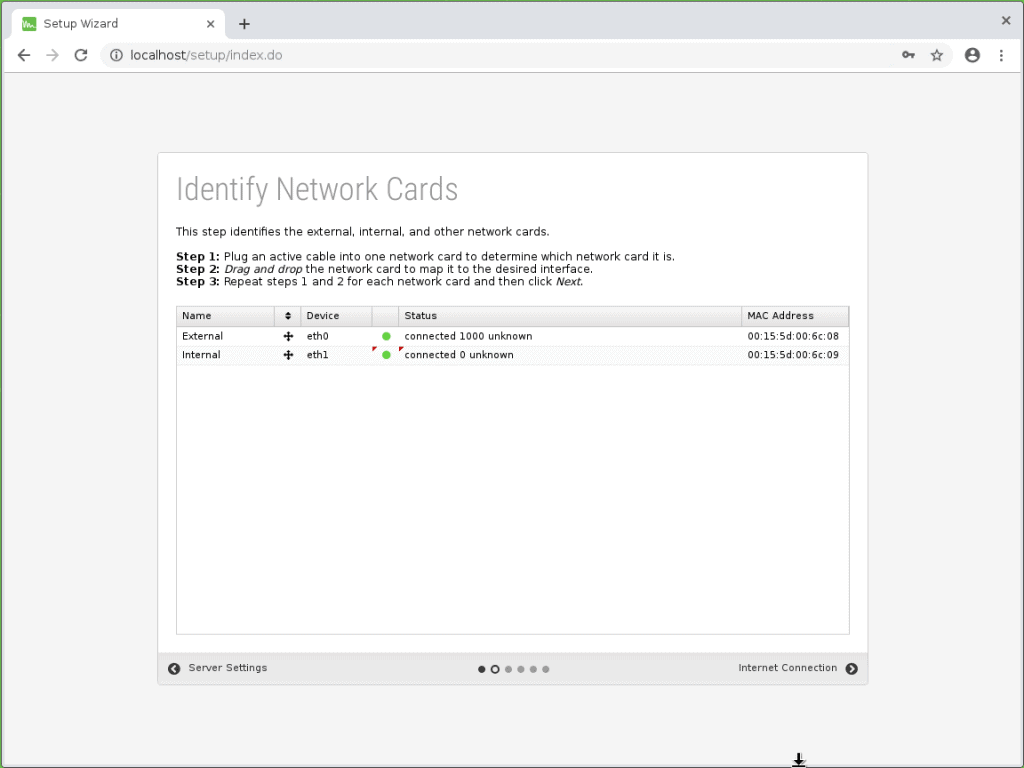
Click on the arrow that says "Network Cards" to proceed to the next page.
So you need to check that both network cables have connections. You also need to check that the correct network card is under external and internal. If both green dots are lit, unplug one of your cables and wait between 30-60 seconds and one of them should turn grey. If that is the correct one then plug it back in, if not then move your mouse over the 4 way arrow and drag it up or down. Once you are happy, click on the next arrow, labelled "Internet Connection"
If all is running well, you will see that you untangle has found an IP via DHCP and if you click the "Test Connectivity" button, it should say "Success!". Depending on your needs, you may either leave it as the IP that is got via DHCP, but more likely you would change it to be a manual IP allocation.
So click on Static and fill in the settings appropriate for your network and then test the connection again.
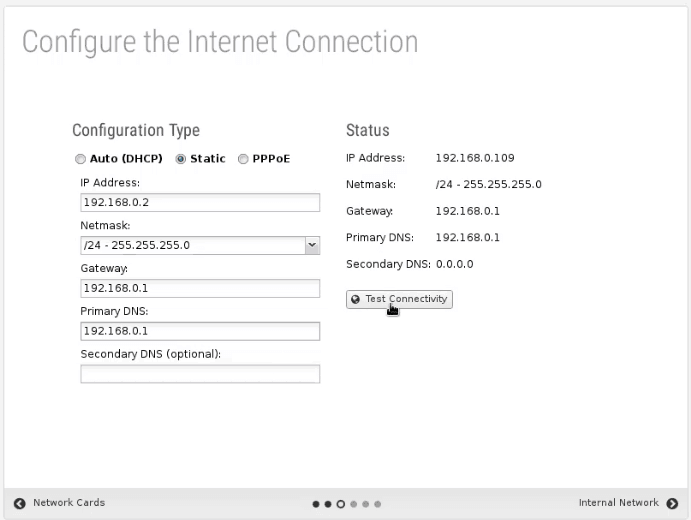
Click on the next arrow for "Internal Network"

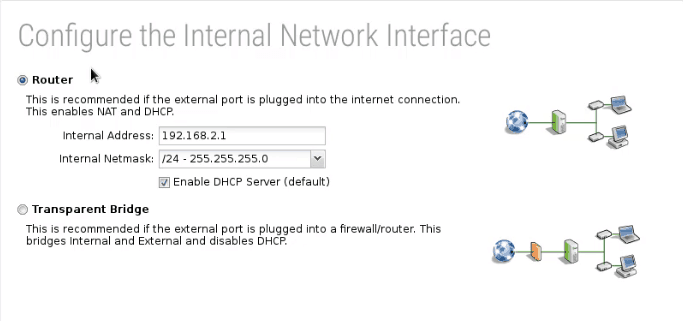
Untangle NGFW Wizard is now complete
To see the difference between router mode and transparent bridge mode, see this article. https://wiki.untangle.com/index.php/Network_Configuration For most cases with people having the one NIC plugged straight into their router and one NIC plugged into the internal network, the Router Mode is the simplest.
Click next on the "Auto Upgrades" button
For most clients they want to set this and almost forget it, therefore the auto upgrades option is always turned on. This setting can be changed later but it checks for updates early in the morning and then updates anything that is needed. The connection to the command center is a must. It allows you or your IT provider to manage your firewall from offsite.

Finally, click finish.

Click on the go to the dashboard. Click on the continue button.

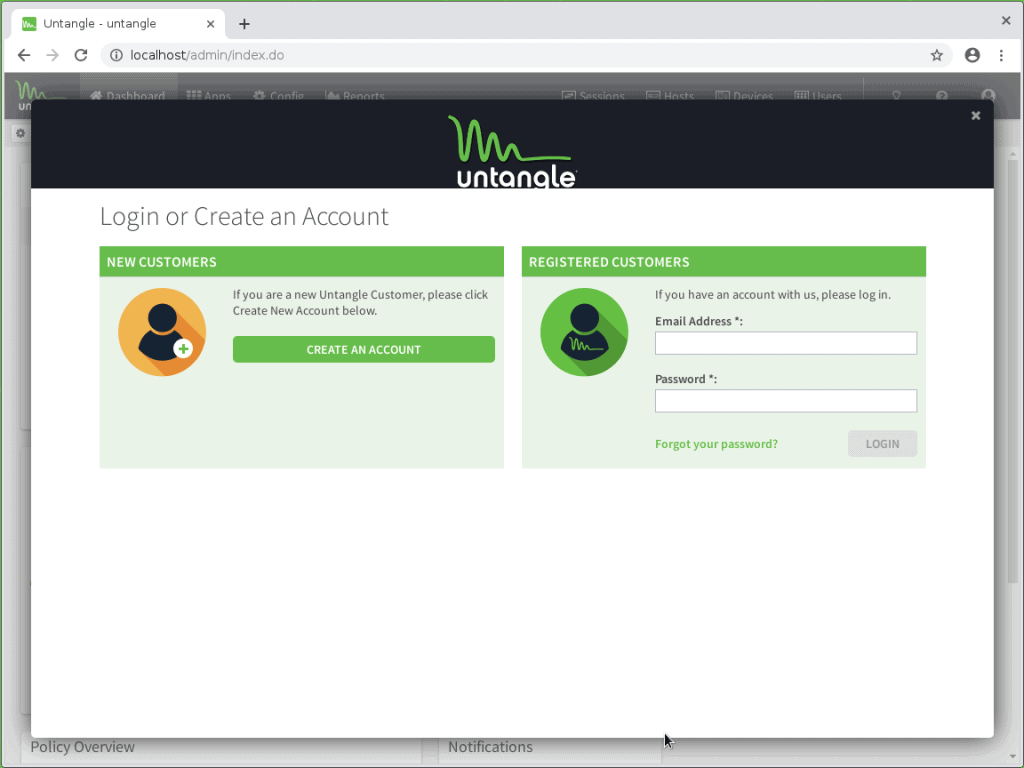
Either sign in if you have an Untangle account or sign up for a new account.
Once you have logged in and untangle has connected to the internet, it will bring up this screen explaining you are done and can continue.

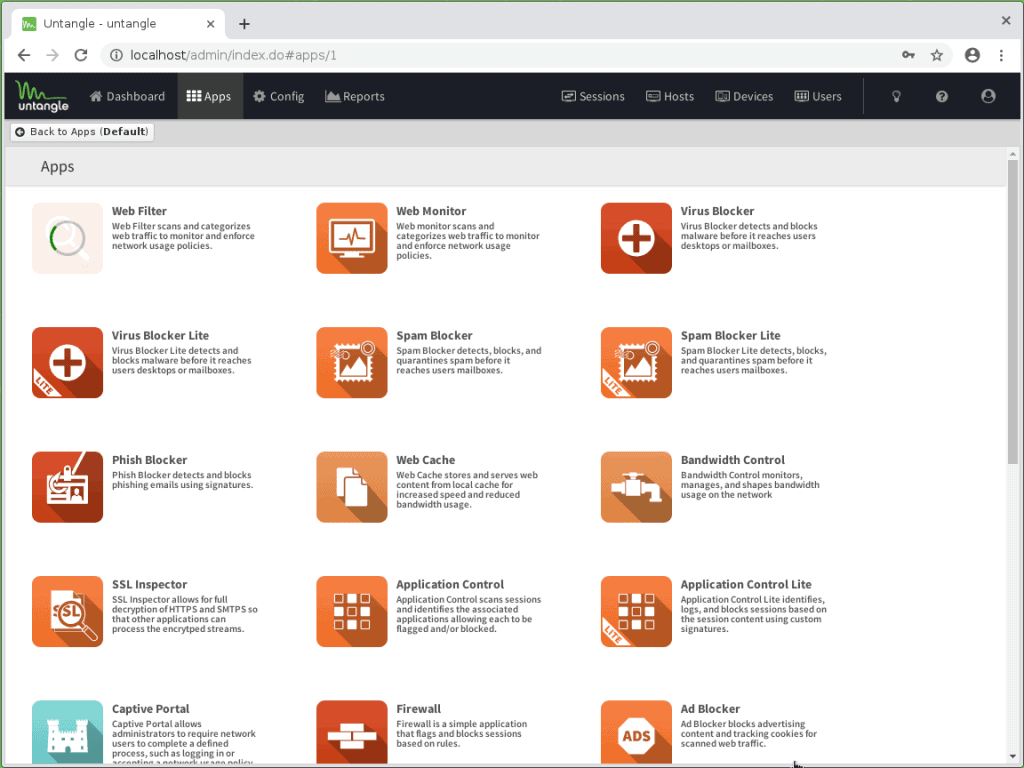
Now depending on what your experience is, you may want to install the recommended apps now or just install them once you are ready. I am going to install manually later.

You are now finished installing Untangle on a Hyper-V.
I will just test that it works now, by installing the web filter.
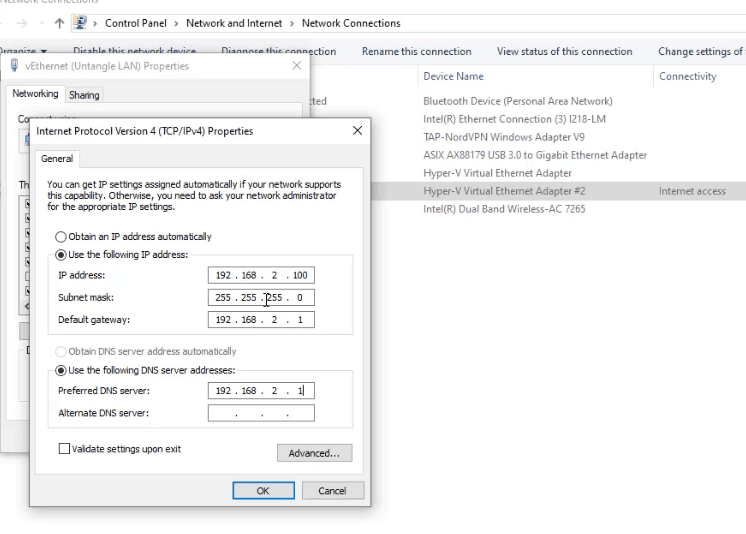
Now you need to make your machine go through the Untangle server. You need to manually update your IP address to use the Untangle as a gateway. Open your network cards and edit the settings of the Untangle LAN card. Now depending on the way you have configured the router mode, you need to configure the Gateway to be the IP of Untangle.
Now get onto the internet to see if you can connect if you can then go into the Untangle Virtual Machine and check that you are registered and Untangle knows you are there. You see below, it says that there is currently 1 user active. That's ME!

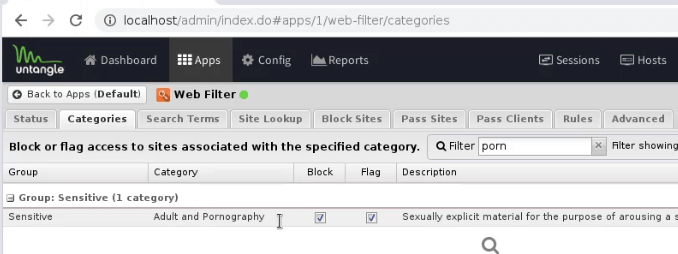
Check if porn is blocked on the web filter you installed. Click on apps on the top, then click on Web Filter, then categories, then type "Porn" into the filter and you will see that there is a tick by Blocked and Flag.
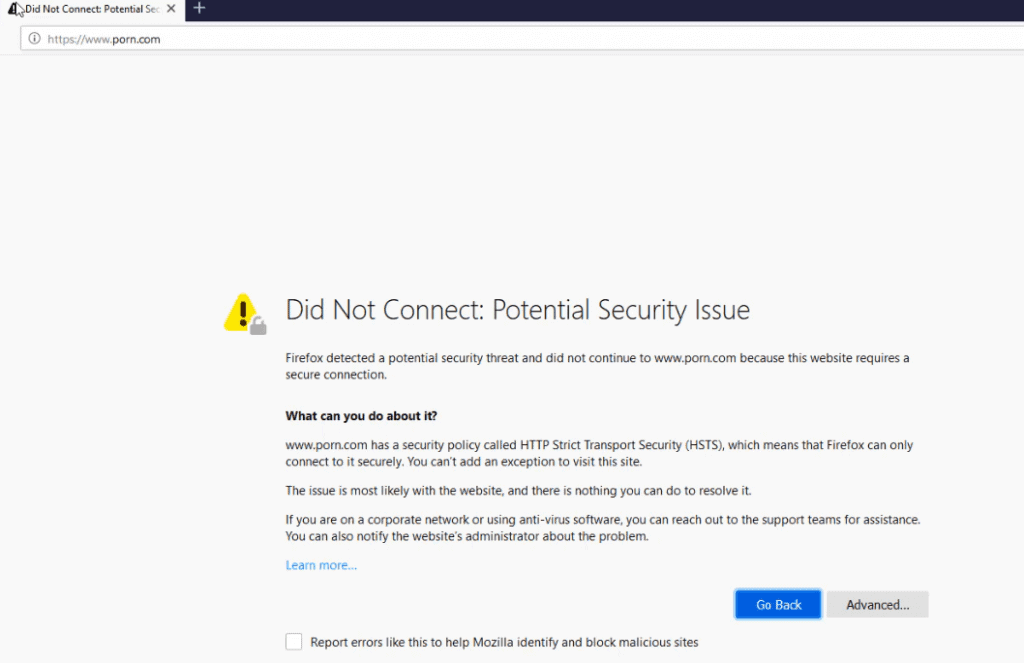
Now finally go back to your computer and type in porn.com to see if it is blocked. If you get to a page like this then you are good.
Get help and Support for your Untangle NGFW
OSH.co.za is a Gold Untangle Partner in South Africa. We have clients all over the world and we would love to help you. We can provide you with a 5% discount for your Untangle software without the need for a coupon. Get in touch with us on the Untangle page for more info.
